Pages

Showing posts with label Plated dessert. Show all posts

Wednesday, 27 November 2013

Baking - Panna Cotta, Chocolate Bonbon & Loy Kratong

Hello!! 

I'm here to update on the demonstrations being carried out on 11 Nov - 14 Nov, and touch up a little on my first ever Loy Kratong (Which I can remember) in Bangkok!

First up, Chef Willy did the demonstration on sugar free plated desserts - the Boule Mystère and the Red fruit panna cotta.


The  Boule Mystère consists of a dark chocolate shell filled with chocolate mousse, layers of sable breton, topped with a gold leaf covered chantilly quenelles and finally covered with a red sprayed chocolate dome - which looks super exquisite, and is super duper tough to make; because you have to be really patient and careful while creating the holes so that the shell doesn't break. 

It's sugar free because the sugar is replaced with Manitol, a type of sugar suitable for diabetic patients to consume. 


Next, we have the red fruit panna cotta - which is a personal favourite of mine; I'm always ordering the Panna Cotta in Osia, a restaurant at Resort World Sentosa; their panna cotta is super creamy and delicious with a generous serving of red berries compote.

This Panna cotta is filled within two white chocolate shells, which has two spheres of frozen strawberry and raspberry sauce, presented on a sablee breton disc, sprayed with pink and white spray and finally...decorated with fresh raspberries, rose petals and pulled sugar rings! (More on that later!


Meanwhile, I would like to express my heartfelt major thanks to James and Por, the two wonderful assistants who helped create these beautiful miniture desserts for tasting! Super cute isn't it!!!

Presenting to you, my Red fruit panna cotta! 


With plated dessert, we can actually play around with the decorations! Here, I created the red sauce look using a drop of sauce and smearing it with a spoon - the easiest and simplest way to dress up a plate. Chef mentioned that the drop of sauce can be slightly smaller though. HAHA!

My first attempt at pulling sugar - creating rings after rings of pulled sugar. We were all wearing gloves, heating up our hard lumps of pulled sugar in the microwave when it is too cold. Quite fun actually, and the heat from the hot sugar is also quite bearable. =)

The next few lessons will be more on sugar, where we will try to present our first ever sugar showpiece! I'm quite excited but I know it's gonna be a mad rush! Just like how my chocolate showpiece practical went (More on that on the next post!)


Closer look at the chocolate spheres with a nice panna cotta center! Well, you do know that because this is a plated dessert, we get to dig in after presentation right? HAHAHA!


Last look! It could be better in terms of plating! I will just keep improving and improving through practicing, I supposed!

Next up, we have the Chocolate Bonbon for the next two demonstrations! On the first day, we had Hazelnut Praline and cinnamon ganache and Cappuccino Ganache.


The Hazelnut Praline and cinnamon ganache is type of chocolate bonbon with a praline bottom, topped with cinnamon infused ganache, and chablonnage with milk chocolate bottom, and left to set outside over night in a chocolate room so that it sets well and proper and retains its creaminess.

It is quite a beautiful flavour, with the cinnamon spice kicking in after, complimenting the taste of hazelnut.


Then, we have the cappuccino ganache, which is filled inside these beautiful shaped chocolate bonbon molds!

Chef also decorated it with some modeling chocolate flowers, jelly, transfer sheet, etc.


Here's a look at my Chocolate Bonbon! I chose to do heart shaped because it was my hubby's birthday and I wanted to send him some love! HAHA! 


The chocolate mold is sprayed with red cocoa butter, with a little gold powder, filled with chocolate, remove maximum so that the chocolate shell is thin...filled with the ganache and then covered with chocolate and let set with a plastic sheet over the back so that its shiny!


I took the chance to make a chocolate dish using a technique I learned from a book; Working with Chocolate. It could have been better if my chocolate threads was piped slightly thicker, because more than half broke off due to the connecting "threads" being too thin.
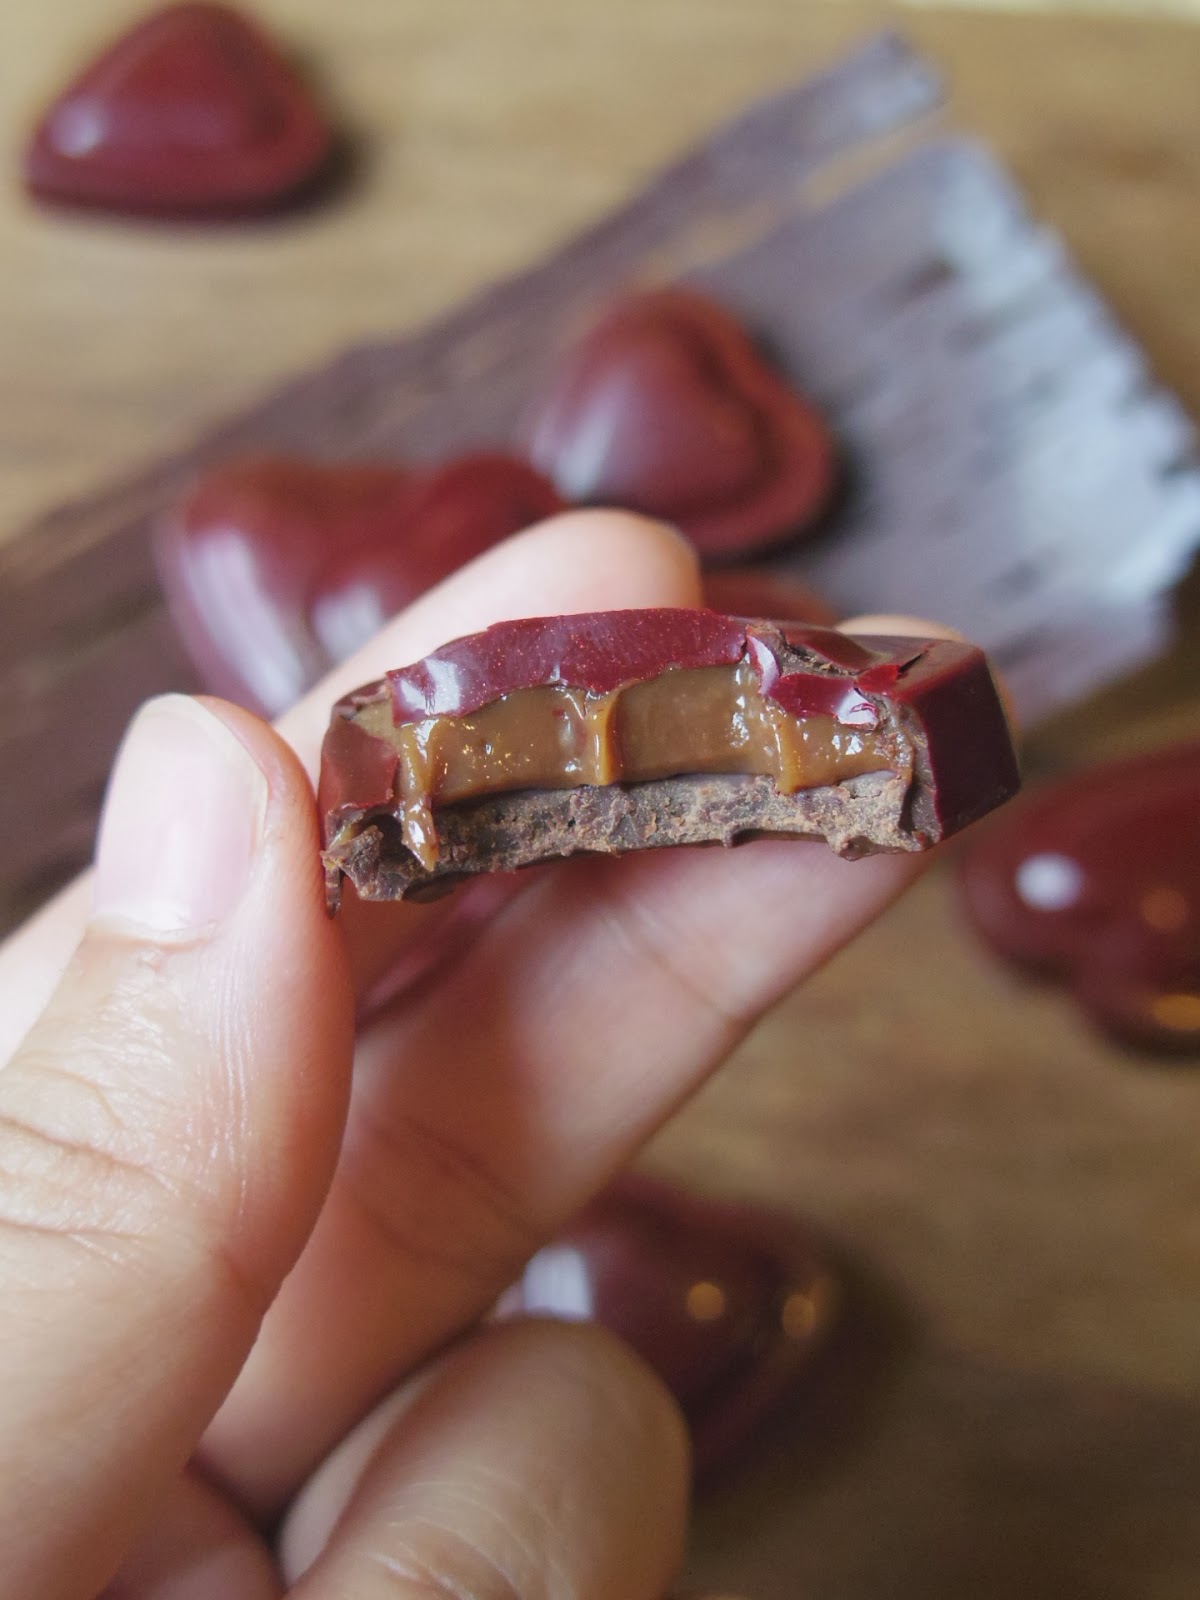


A look on the inside! The bottom chocolate should be slightly thinner, but as this is the first time we did chocolate bonbon with mold..I didn't know how to gauge how much more of fillings I should have piped. =P


Next, the last demonstration for the week is still on Chocolate bonbon, but in the form of doing chocolate bars with different fillings! 


Here, we have the crystallized hearts, which is made with pastillage (made from gelatin powder and SQ icing sugar, mixed together till it forms a nice soft dough, which can be rolled out), and soaked in candy syrup made of water and crystallized sugar for nearly 4-5 days.

The result of that is sugar crystals forming around the heart, creating a beautiful, sparkling crystal heart.


Then, we have the chocolate bars with dry fruit/nuts! Chef advised that by adding dry products like fruits or nuts to chocolate, it can help prolong the shelf life of the chocolate product.


Next, we have the Caramel Passion fruit ganache (which was a super hot favourite!!), filled with passion fruit puree, and decorated with colourful cocoa butter dye. It's like graffiti art!! I love the look and fell in love with the taste, the sweetness of the white chocolate is reduced with a nice sharp tangy sourness of the passion fruit!

I would make this bonbon when I'm back! 


For our practical, we have the chocolate bar with vanilla ganache with tonka beans! Tonka beans is a type of spice that is commonly used in perfume making, and is super duper fragrant. It has the fragrance of Vanilla, and hints of cinnamon, if I am not wrong!


Last but not least, Chef created a sample piece using left over nuts and chocolate, rolled between two bubble wraps, let set and randomly cut to sizes! These chocolate bits are equally delicious, and can be samples for little kids and adults to try.

Presenting to you, my chocolate bars with vanilla ganache and tonka beans! =D 


It's a pity that my chocolate set a little too fast upon pouring, and hence when I scrapped to remove the excess at the back, my chocolate wasn't smooth at all, instead, having these wavy curves. =(

Oh well, after the usual school week, I had something to look forward to, on Sunday! It was the Loy Kratong Festival - where we apologise to the Mae Nam (Mother Nature/water) for polluting the water, and in this water latern, we put in a coin, a clipped nail and a strand of our hair to symbolize washing away our bad fortune so that we have good fortune in the coming year!


Some of the beautiful Kratongs available for sale! My friends, Jane and Mew and myself, took a Tuk tuk down to Asiatique, where I've heard that the people in Bangkok usually head to, to release their kratongs. We took a tuk tuk instead of the ferry because boy, the whole place is super crowded and packed! The traffic jam was 2 hours over from the main road to the Asiatique itself!

We count our lucky stars that the Tuk tuk driver knew the shortcuts. He was speeding all the way though, and we hanged on for our dear lives! It was also a good thing that we reached our destination in less than half an hour.


This is my Kratong! I initially bought another kratong with roses and all, but it was a mistake! The kratong was made with a foam bottom - and this was made with a coconut tree disc (I think), anyway, something organic that won't harm the sea lives in the sea.


 Jane, Mew and myself! 


Sorry for the blur photos - taken with my phone. 


Lovely, lovely kratongs! Besides these lovely flowers and leaf type of lanterns, there was also lanterns made out of bread, biscuit, etc!


There was so much going on, there was a night market along the road for a food fair event, we also had dinner at a nice live bar restaurant place right next to the ferries wheel. It kept raining water droplets though, because of the condensation from the ferries wheel.

The journey back home was super tiresome! We were stuck in traffic on a tuk tuk for 2.5 hours! There was two lanes, but one of the lanes was occupied with party goers (What the hell are the pavements for!!) and there was this one stupid car who occupies two lanes! And the rest of the other cars doesn't even honk or anything. This continues for another 45minutes or so. Like seriously?!

When I finally got back home, I had a major pimple from the pollution. =(

Ah well! At least I had fun! =D

Alright! That pretty much sums up my wonderful week! Next up, will be an upcoming post on my first ever chocolate showpiece! I'm dreading to show it actually, because I could have done so, so much better. Oh well!

Till then!


Tuesday, 26 November 2013

Baking - Shot Glasses & Molecular Snicker plated dessert

Hello guys!!!

So sorry for the lack of updates recently! I know, I've been like 3 weeks late with my updates and all, plus it's only less than a month till I fly back home for good!!

There's so much going in the recent weeks of school, but yet, if I run it through, you'll feel like there's nothing much!

First up! Allow me to cover the practicals and happenings from 6 Nov - 9 Nov'13!

Basically, we had demonstrations on shot glasses and some basic molecular plated dessert - which in this case, Chef Fabrice dissected a snicker bar's components and have it assembled on a plate.


First up, we have the Mont-Blanc Shot Glass, which has swiss meringue on bottom, covered with vanilla white chocolate whipping cream, topped with chestnut mousseline and pear milk chocolate jelly.

I liked this so much because of the sweet, creamy chestnut. =D 


Next, we have the cream cheese & raspberry jam shot glass; which has layers of light almond pistachio biscuit, with red fruits compote and topped with creamy au fromage blanc.

Chef decorated it with hues of red, from the raspberries and the rose' petals, making it oh so romantic! 


Then, there's the chocolate shot glass, which is made with chocolate flourless biscuit, feuilletine, topped with two types of mousse - the cocoa bean mousse and light dark chocolate mousse, and topped with a layer of chocolate jelly.

The translucent looking decor is made with cocoa nibs, which is baked on glucose in the oven. It's really pretty, but super sweet and bitter. 


Then, we have the apricot panacotta shot glass to round up the demonstration for shot glasses. There is the apricot compote, jelly, creamy dark chocolate and filled with panna cotta mixture. Chef decorated his with mini macarons and gold, just to give it a little shine.

After this demonstration, I have new respect for chefs doing the desserts at buffet tables. =D

Here's a look at my chocolate + Panna cotta shot glasses! We were able to decorate however we like to. 


The peach slices was torched with a blow torch to give it a little smoked edge.


Then, there's my chocolate shot glasses, which I've decorated with pink rose petals (because that's all that's left in the prep room) though I would love to have red instead, because red makes dark chocolate stand out!


Check out the different layers of the mentioned components! Pretty, isn't it? 


For the last demonstration for the week, we had the molecular plated dessert done by Chef Fabrice!


The demonstration was pretty dry, my interest was fading quite rapidly, because most of the works has to be prepared in advance, and most of the components was created using Nitrogen.

However, molecular cuisine is quite interesting if you love science and physics.


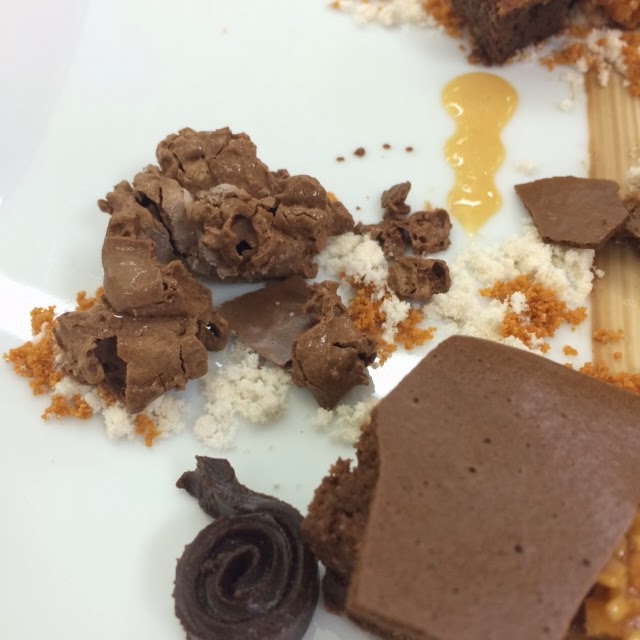
Here's a closer look at my plated dessert! 


As the shape of the plate is different from Chef's, I plated the dessert to suit the plate and not have too much of an empty part of the plate showing - something which I've learned from one of my dessert books.


Closer view - there's the white powder; which is milk powder, the brown powder is the praline powder, then there's the peanut caramel balls, chocolate Gianduja (I can't remember which was this).

The 3 drops on the plate is actually a sweet caramelized milk sauce. 


The melted weird looking thing is chocolate foam dipped in Nitrogen, instantly freezing it and giving the frozen look. The dark coil thing is strips of chocolate jelly, which we called it chocolate flexible.


The dark flat pieces is actually a type of dark chocolate meringue, dried in a dehydrated machine till it's super crispy for about 24 hours. Then, beneath it, are cubes of chocolate biscuit. On the right hand side, we have the caramelized white chocolate sorbet.

Does it taste anything like Snickers? I would say, "No.".

However, like what Gordon Ramsey always says on MasterChef, "It's a bloody good effort!".

Then, on Saturday, we went for dinner at Long Table to celebrate Wei Chuan a.k.a Panda's birthday! 


I *ahhem* specially bought entirely new outfit for the dinner - because it's smart casual,and the initially planned clothing was not suitable, in fact, what's left of my 3 months worth of clothing is only T-shirts and jeans and one pink shift dress from Topshop; which is way too formal.

HAHA!

On the bright side though, I super love the prints!


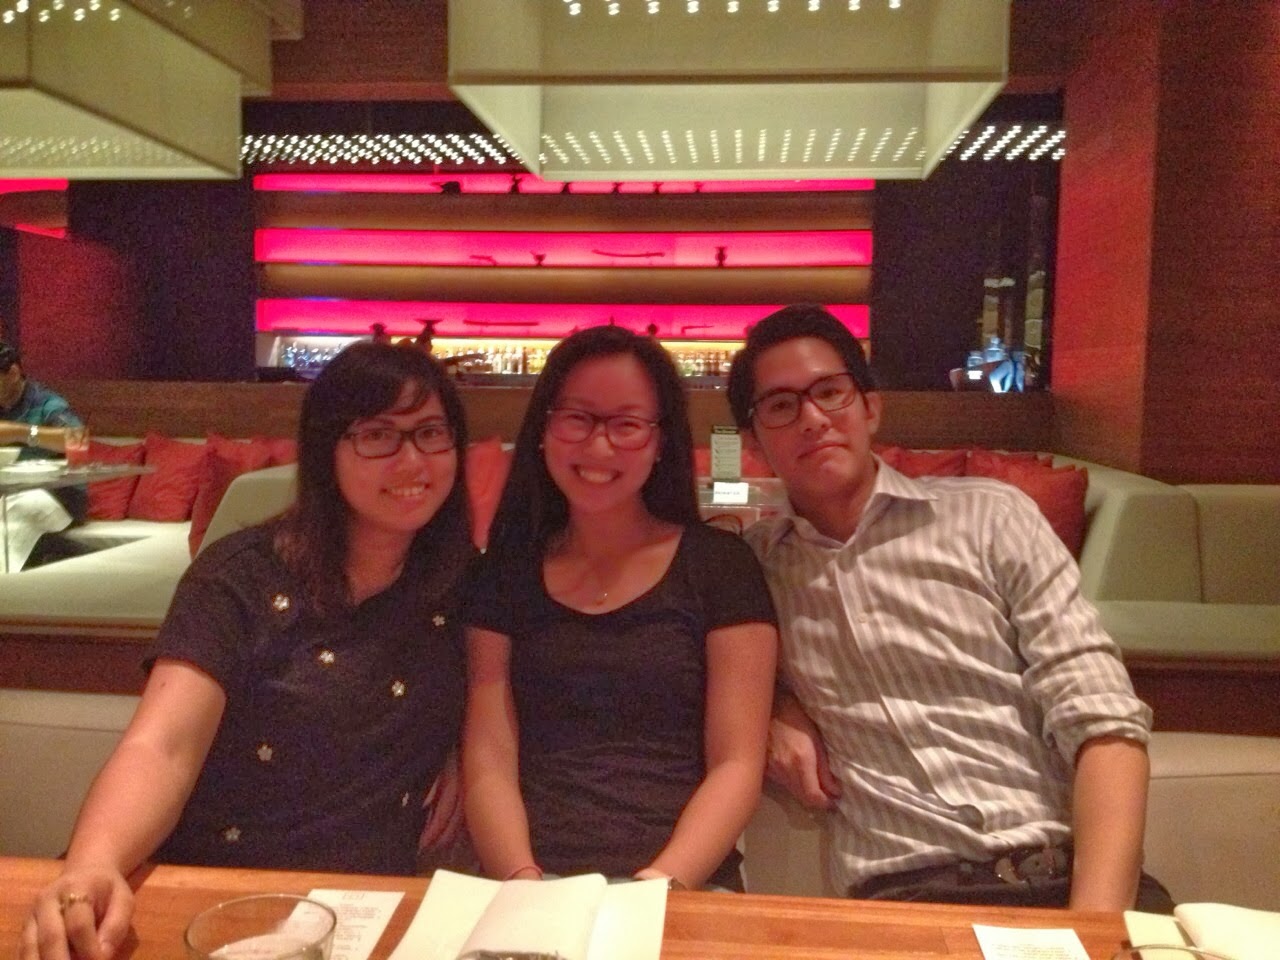
A shot with Charmaine - the only person I can speak Singlish to, in school. HAHAHA!


Another shot with Charmaine and Way; who has completed his wine course and all! Pretty impressive! He's a pretty nice guy and certainly does not look like his age!! (Hint: a year younger than as Ben!

The ambience at Long Table was nice, but that's about it. There's fixed menu for food, but I didn't like the food at all, it wasn't impressive, and definitely not worth the $2200 I was paying for. But hey! The company more or less made up for it!


With Panda, the birthday boy! 


A group shot after the meal - a mixture of pastry and cuisine students! Chef Marc and Chef Willy came as well, but I didn't managed to take any photos with them. Went straight home because I was dead beat!

Next up, I have a post coming up on Chocolate bon bon, my chocolate character, my first Chocolate showpiece (which was a disaster!) and more on my exam theme!

Stay tuned!! =D


Wednesday, 21 August 2013

Baking - Assiette Masaï Brisure Au Cacao

Happy mid week! 

Just wanna pop by and update on what Chef Willy has in store for us today! He went through the demonstration for 3 different recipes for doing restaurant desserts, desserts serve on plates.

Today, we have the Assiette Masaï Brisure Au Cacao, Moëlleux Chocolat à la crème brûlée vanille and Moëlleux chocolat façon palace.


The Assiette Masaï Brisure Au Cacao a.k.a Plated masaï with cocoa brisure consists of a few components, with a peanut feuilletine base, vanilla bavarian spheres, sacher biscuit, biscuit crumbs and chocolate glaze. I'll share more on this right below!

It's a fairly complicated entremet to bake, but once you get each ingredient going, assembly is a breeze.

Then, according to Chef Willy, creating a chocolate spiral on the plate is the toughest thing of all - and I couldn't agree more! 


Next up, we have the Moëlleux chocolat façon palace a.k.a Chocolate Lava! Yes, it does looked a little different from the usual Chocolate Molten lava cakes we get from most of the restaurants back in Singapore.

This lava cake is filled and baked in the cups, and then topped with a frozen vanilla Chantilly covered with craquelin argent; a caramelized chopped almond mixture with silver powder.

The cake is baked on the top but still retains the liquid on the bottom, the chantilly spheres melt on the top, giving it a nice creamy texture during tasting. Still, I prefer mine being slightly more baked around the sides, with the centre being soft and liquid.


Chef Willy probably knows that, as he also introduce another soft cake baked in the ring beurre with icing sugar/almonds - the Moëlleux Chocolat à la crème brûlée vanille.

This cake consists of chocolate moelleux like the chcolate lava, but with the addition of a vanilla creme brulee sphere inserted inside, and baked together. Chef Willy serve his chocolate soft cake with a pistachio ice cream coated with pink pate a glace to prevent the ice cream from melting during the photo shoot.

After the demo today, we had our class photo taken. I was joking with Mew on how our faces seemed to expand sideways term after term, and that we need to buck up before it reaches a 6" pasta size next term! HAHA!

Presenting to you, my plated dessert; Assiette Masaï Brisure Au Cacao!


Breathtaking yes???

I practiced twice on cling film before doing the spirals on the plate, abstract art; as what Chef Willy said to present! I'm actually quite happy with my spirals, but Chef Aum said to make it more round next time. What do you think?

During this practical, each team did a different component of the cake and we shared among 8 of us, who was already standing on one side of the kitchen.

Mew and myself chose to do the Vanilla Bavarian for our group - using the Anglaise method, we pipe the mixture into flexible molds of big and small spheres; one to be inserted inside the entremet, the big one to be glazed and placed on the top.

The rest did the feuilletine, which has to be cut into small discs, the sacher biscuits also cut into small discs and the glace was also done by the time every one was ready to do their assembly.


We also had to do the biscuit crumbs, consisting of the sacher biscuit left overs, with some icing sugar and liquid red colouring combined together and processed in the food processor and processed to fine crumbs, which is then sifted once before use.

That was used to do the masking for the sides. It is a deep rich beautiful colour of Bordeaux!

I find that the challenge here besides the spirals, was on how to handle the mousse. The mousse gets soft really fast, despite being out from the blast freezer minutes ago. The trick is to understand your mousse; it cannot be too frozen, eitherwise it is not sticky enough and your crumbs will not stick to the sides. Yet, it cannot be too soft because the whole entremet will then disintegrates in your hands.

That, my friend, is why you get to prepare 3 individual servings and choose the best out of all 3 to present!

If you have not noticed, it is also the first time we actually get to blow gold powder and use it for our entremet!!! Mad pleased about this! MUAHAHAHA!  


A closer look at the layers!

Peanut base, the white sphere is the vanilla bavarian and the darker looking disc is the sacher biscuits, with milk chocolate mousse all around. I get to dig in after presentation, and packed the other two individuals back home!

One of my best work/experience so far! What say you? ;)

Till next time!